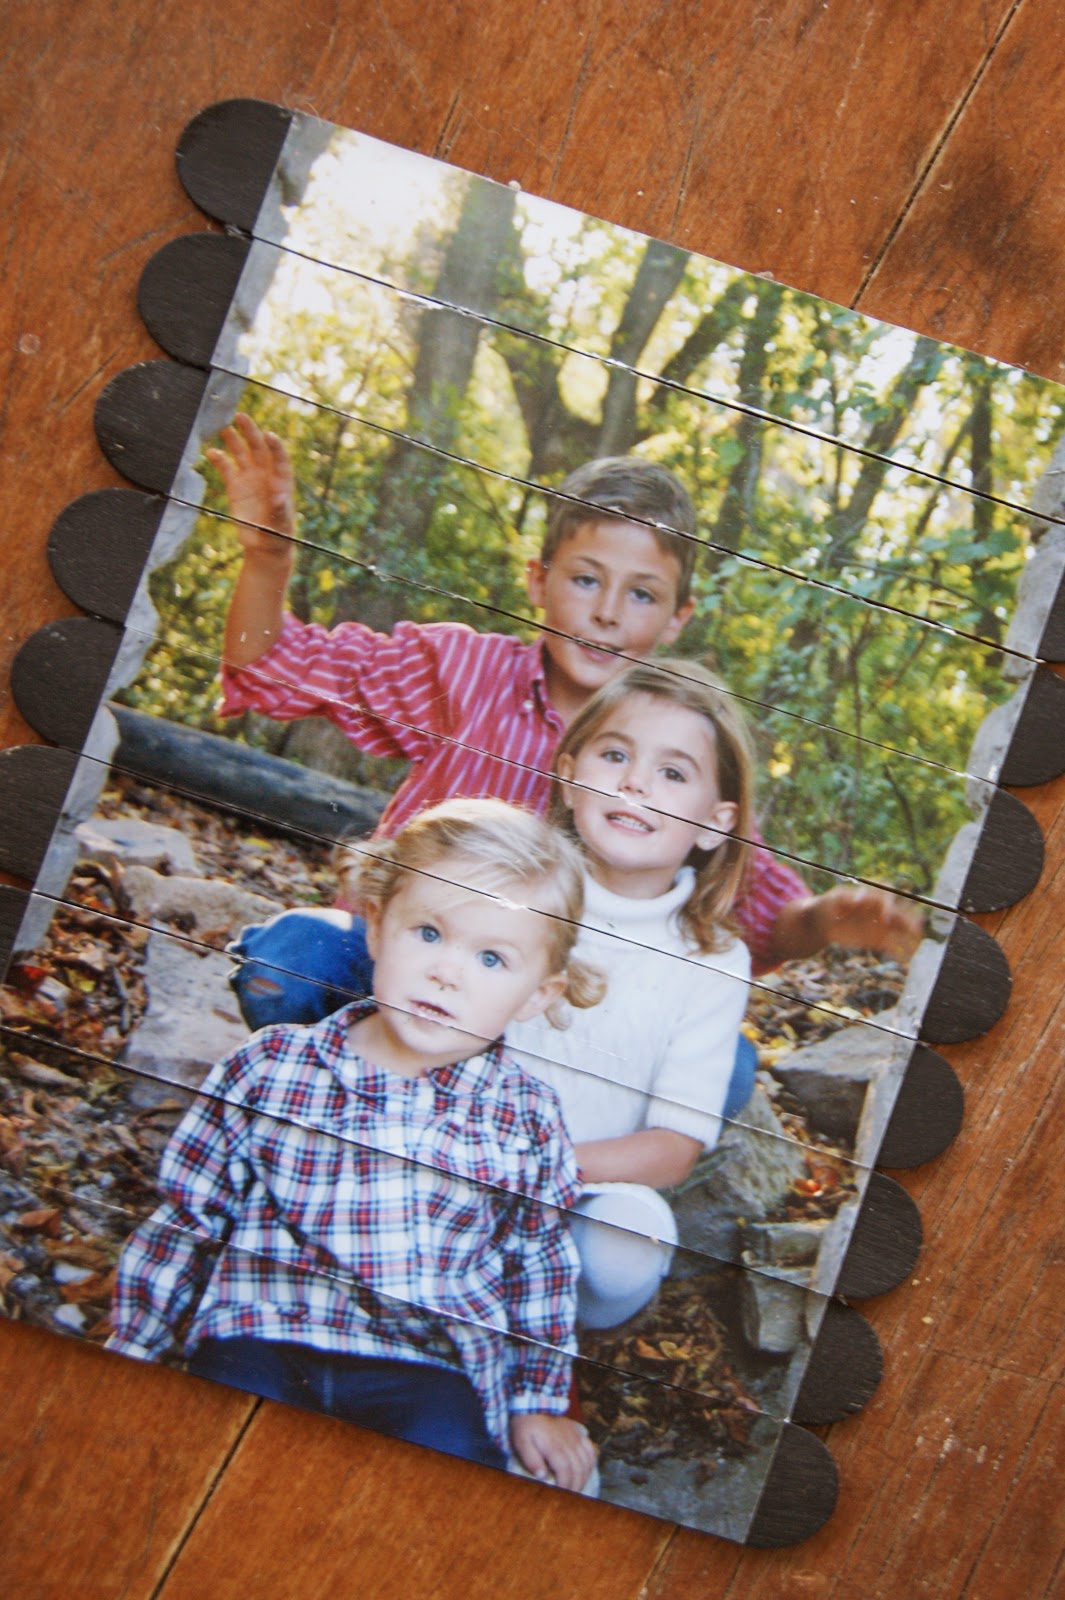
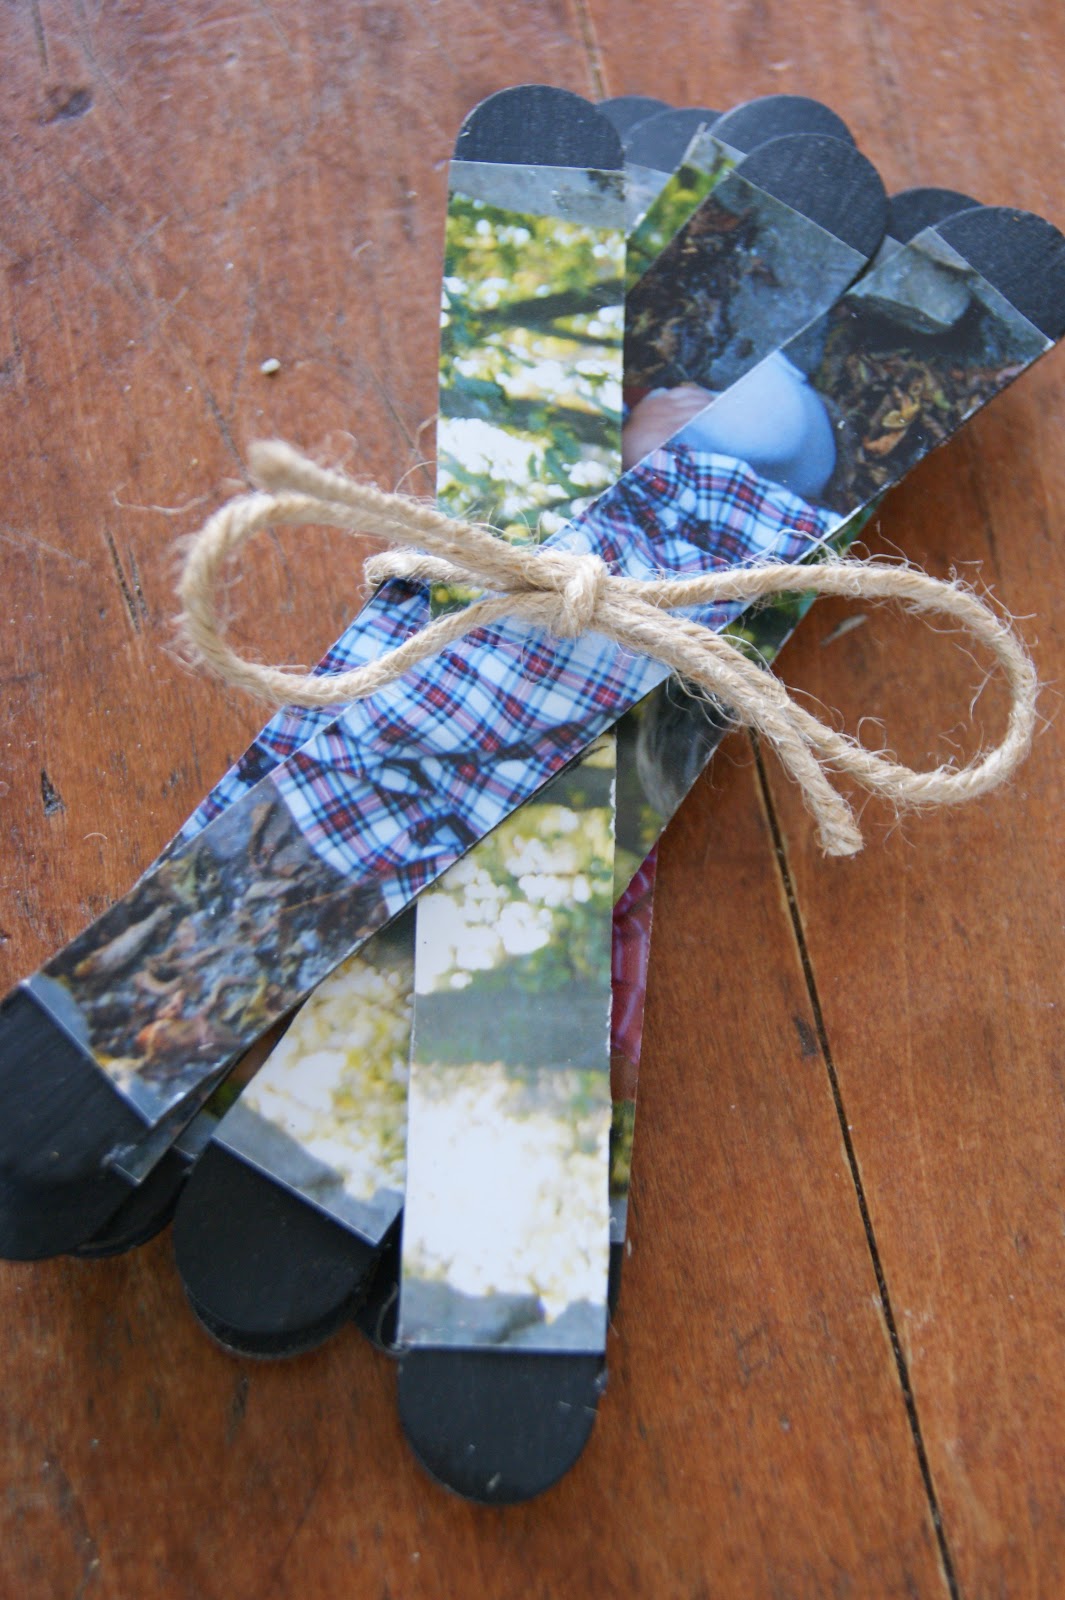
I had a bag of these craft sticks laying around for ever. I knew I had to come up with something to do with them. So here it is, a craft stick puzzle for the kids. Such a simple project and my three year old is loving it!!
Craft Stick Puzzle

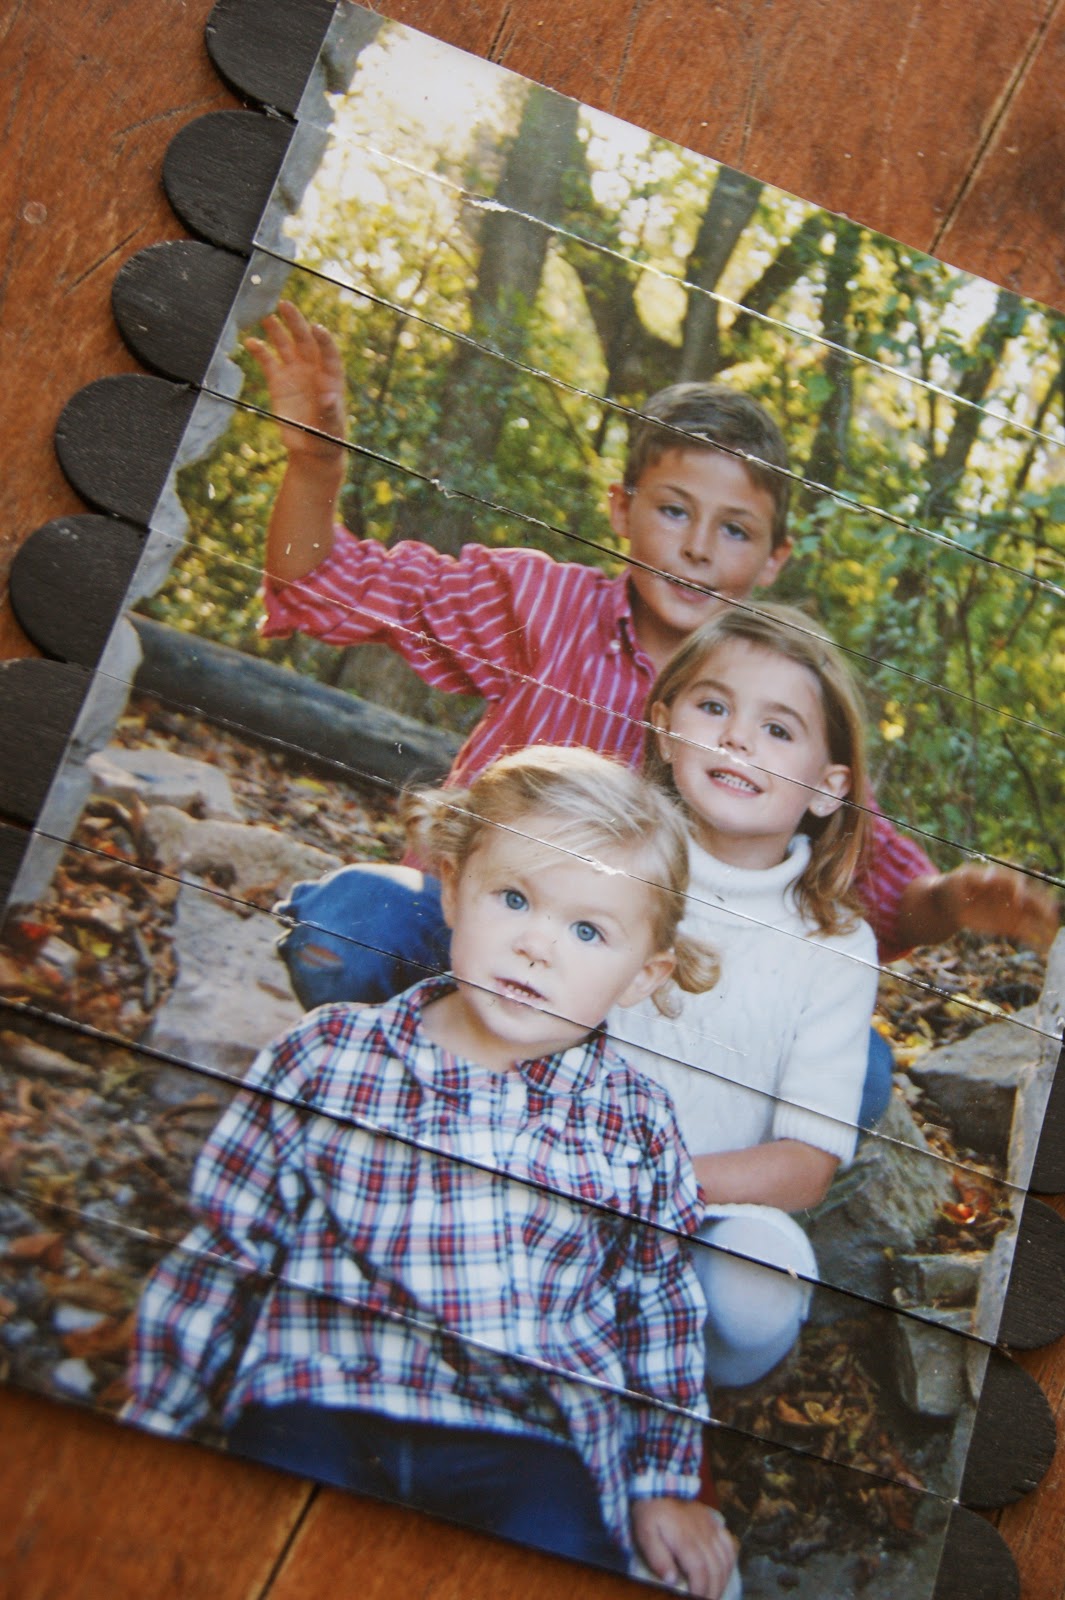
What you need:
Craft sticks
Paint
Mod Podge
Photo
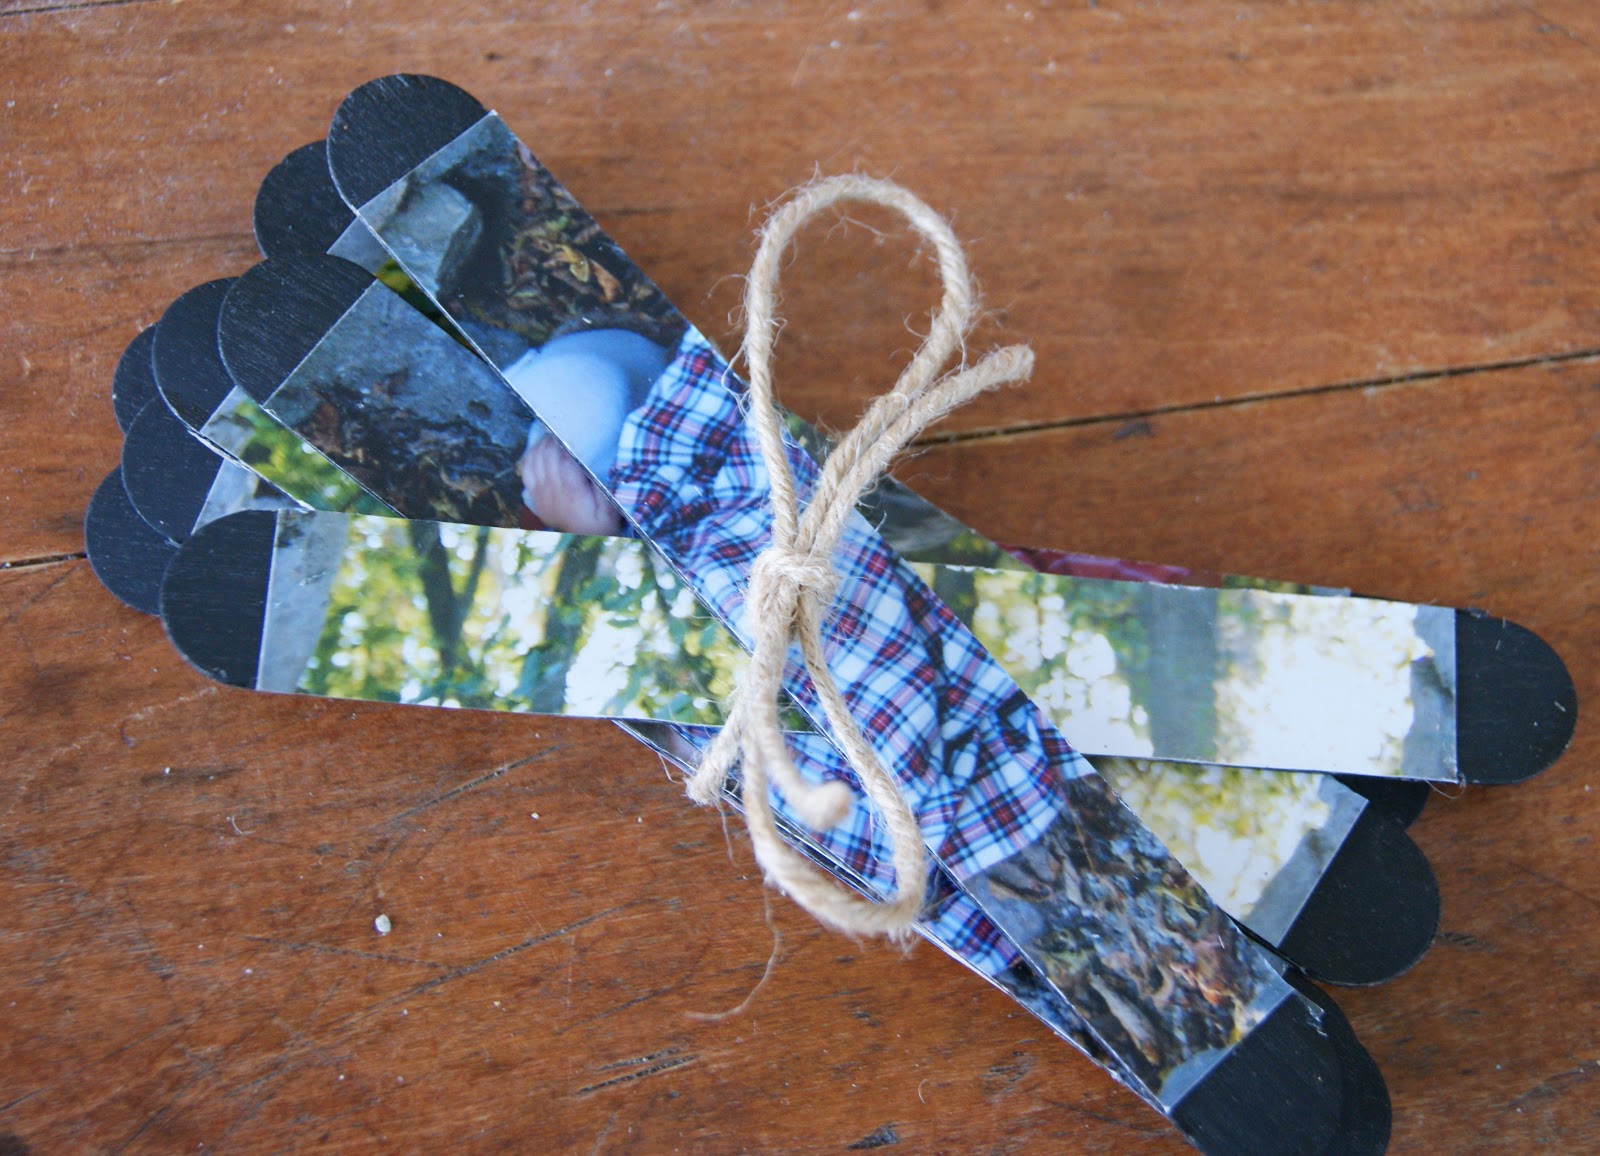
To start, paint your craft sticks to coordinate with your photo. Next, line your craft sticks up to make a perfect pallet for the size of your photo. Paint a thin layer of mod podge onto the craft sticks and lay your picture on top. Add one more layer of mod podge over the top of the photo. After it's all dry, use an exacto knife to cut in between each of the craft sticks. There you have it, such a cute puzzle for only a couple cents!!