My Recent Posts

Friday, January 31, 2014

"Be Mine" Banner


 With Valentine's Day approaching I figured I should probably make some new Valentine's Day projects.  Who doesn't like banners.  There perfect for anywhere, mantel, hutch, window, or even a headboard.  I found this red polka dot burlap fabric and I had to have it.  Burlap and polka dots in one!!  So I decided to add "Be Mine" and of course, a heart.  I than, strung each piece with twine to hang. It turned out just adorable!  To purchase, go to Craft Crazed Mom on etsy!

Monday, January 27, 2014

I Love You Sign


 While I was at the fabric store, this "I love you" pattern caught my attention.  It was so cute!!  I had a wood plaque at home that happen to fit the saying just perfect.  I painted the plaque red and distressed it a little.  After using some mod podge to attach the fabric, I drilled two holes in it and strung it with twine.  Adorable to hang anywhere for some new Valentine's day decor.  To purchase go to Craft Crazed Mom on etsy!
post signature

Saturday, January 25, 2014

Angel Wings Pallet


 With my etsy shop now up and running I decided to work on some more pallet art!  I found this image of angel wings on my silhouette program and thought they were just beautiful and would work great on a pallet!  I simply printed the image and stenciled it right on.  I'd love to keep it for myself but I'm running out of room, hopefully somebody else will love it just as much as I do!  Go check it out at my etsy shop Craft Crazed Mom!

Friday, January 24, 2014

Bedroom Wall Decor


So my husband decided to get a new TV for our bedroom.  With that being said, he went ahead and covered up our wall decor, which to him, he didn't see as a problem, but it looked ridiculous!  I went ahead and made a new wall arrangement!  We had a white shelf  and it worked out just perfect for working around that big TV.  After adding a few pictures, it still looked a little sparse.  So I added the two canvas pictures on the sides.  Although I'm opposed to TV's in the bedroom, the new wall decor turned out beautifully!

Monday, January 20, 2014

Moss Covered Monogram


So I had posted this monogramed moss letter a while, but I decided to give it a makeover. Mine was about 4 years old, outside in Wisconsin, it kind of did a number on it!  To start out I took some foam to use as my structure.  After cut out, I traced the letter on to my sheet moss, both front and back.  I used long strips to cover the insides of the structure.  Glueing and pining the moss onto my letter.  After it was complete, I added a burlap bow to hang it by!  It sure looks a lot better than it did before!
Order your own online at my etsy shop!

Sunday, January 19, 2014

Wedding Chalkboard Sign


 I love anything personalized!!  I've seen signs like this before and I thought I'd give it a try and make one of my own.  I bought a black 12x12 canvas and aged it with some chalk!  On my silhouette machine, I designed a template with all the names and dates I needed.  
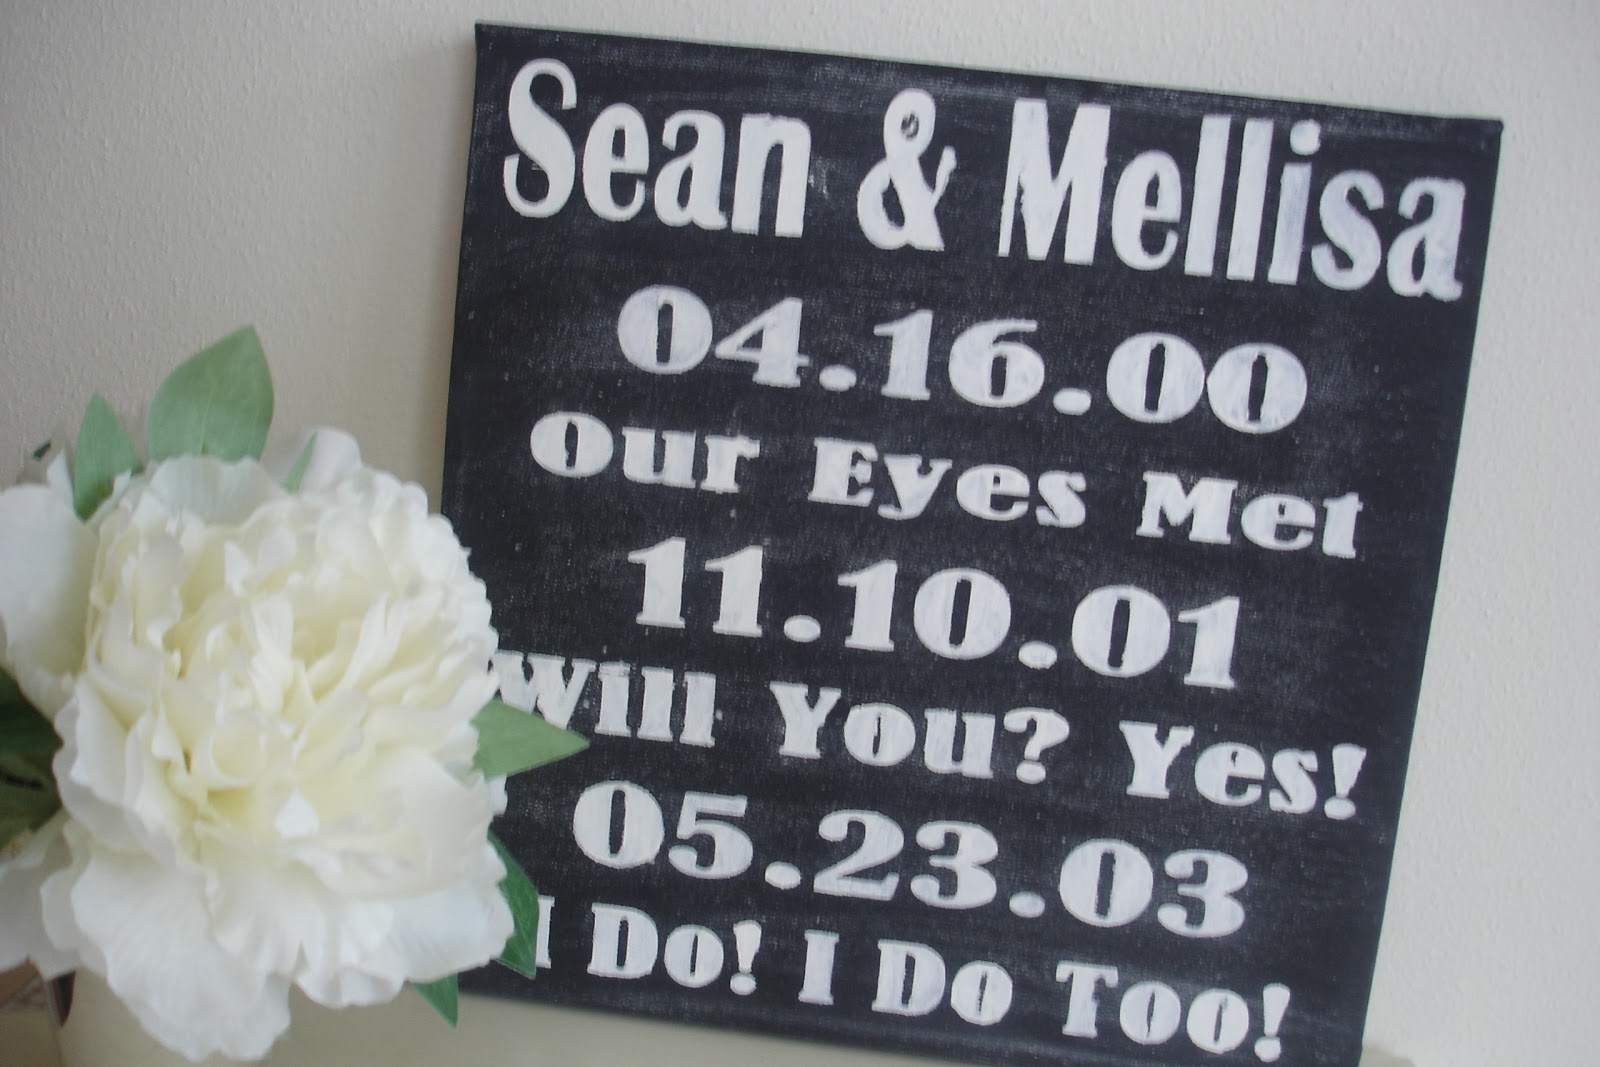
After it was cut out, I used it as a stencil.  Some of the words come out imperfect, which I'm great with, because it gives it that aged look.   I love the way it turned out, and it means so much more because it's personalized!!

Order online at Craft Crazed Mom!

Thursday, January 16, 2014

Vintage Bicycle Canvas Tote


Recently I came across this cute image on my silhouette machine and I wondered what I could do with it?  Than it hit me, a canvas tote bag would be perfect.  I printed the image out and used it as a stencil.  After the image was on, I thought I'd dress it up a bit and add some flowers to the basket and a banner on the bike.  It still needed a little something else to even it out.  As usual, I added a few fabric flowers to the corner.  So adorable, and who doesn't need a tote bag?

Order one online at Craft Crazed Mom.

Wednesday, January 15, 2014

Chevron Burlap Picture Frame


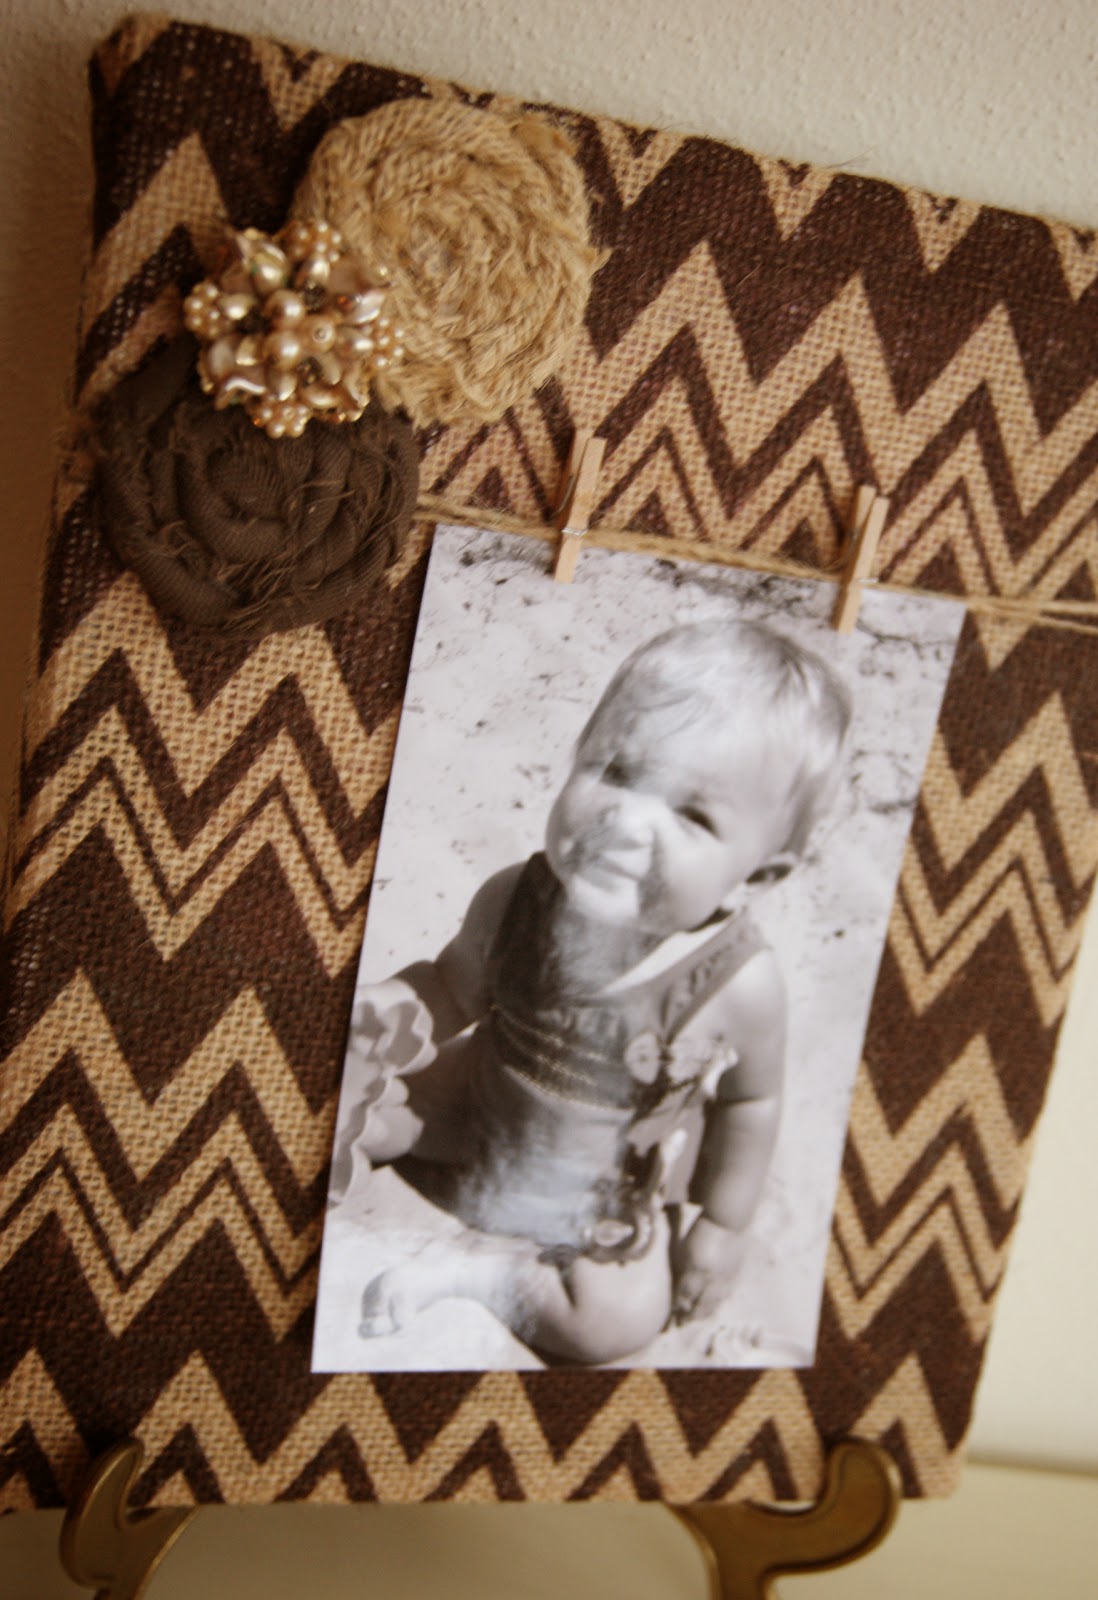
 I had a 8X10 canvas that had been sitting around here, and I decided I could use a new frame.  I took some brown burlap chevron fabric and glued it on to the canvas. I used twine to wrap around the canvas to hang my picture from.  Of course I still wasn't satisfied, so I added a few fabric flowers and a vintage jewel to dress it up!  With a couple of mini clothes pins, I hung my picture!  So simple and so cute!

Give it a try or buy it online at my esty shop Craft Crazed Mom!

Monday, January 13, 2014

My Etsy Shop

I finally did it!  I got my etsy shop up and running!  Don't feel like making projects, take a look at my shop and purchase them directly!  Many personalized items, great for weddings or baby showers! Check it out at Craft Crazed Mom!

Kids Annual Questionnaire

So for years, I've been annually asking my kids the the same 20 questions on a basic questionnaire that I had come up with.  It's already so fun to look back and read how their answers change so much in just one year.  I'm sure as adults they'll really get a kick out of looking back and reading them.  Since I'm not that great on the computer, my questionnaire is pretty basic, but I was able to find a very similar printable quiz at Lansdowne Life (it's way cuter than mine)!  
Here's the questionnaire from Lansdowne Life:


Here's my (not nearly as cute) questionnaires:


Thursday, January 9, 2014

Iron On Bow Tutorial


As I was out shopping over the holiday season, I had seen so many cute sweaters with different appliques on them.  I thought to myself, why can't I just make one myself and save myself the fifty dollars.  I searched through my closet and found a plain black sweater I already had.  I then found some leftover gray fabric from an old tablecloth.
To start off, I cut out a piece of my gray fabric about the size I thought I'd need.  I than used heat transfer interfacing, which I ironed on to the back of the fabric.  I used my silhouette machine to cut out the bow.  If you don't have a silhouette machine, you could easily find a silhouette of a bow online anywhere and cut it out yourself.  After my bow was cut out I simply ironed it right on.  I now had a brand new sweater, looking just as cute as all of the others for free!

Posted by Picasa

Tuesday, January 7, 2014

What To Do With Christmas Cards...


I don't know about you, but I always hate throwing all of my Christmas cards away.  Years ago, I decided to start saving them all.  To keep them all together and organized, I decided to bind them all together.  I made a title page for them, including the year.  It's already fun to take a look back at the past years!    

Related Posts Plugin for WordPress, Blogger...

Follow by Email

Follow Me On

Total Pageviews

Check out all of my pallets!

Google+ Followers

My Etsy Shop

My Latest Pins!

' $(e).html(html); //correct href for images so they point to Pinterest $(function() { $('.rssFeed a').each(function() { var href = $(this).attr('href'); $(this).attr('href', 'https://www.pinterest.com' + href); $('.rssFeed img').attr('nopin','nopin'); }); }); }; })(jQuery); })(jQuery);

Where I Contribute

This Silly Girl's Life

Grab My Button